Menu bar pages

Showing posts with label Stitched Wall Art. Show all posts

Sunday, January 22, 2017

Thread Sketched Africa


I have always been drawn to giraffes.  Their grace and beauty is hard to resist.   Elephants, recognized for demonstrating human-like emotions, are beloved and revered worldwide.  The unique features of these animals made them perfect subjects for whimsical thread sketches.    I hope you enjoy!


Starting From Sketch

It took several attempts to get a design that appealed to my sense (or lack of) balance.  For changes too large to erase, I taped a new layer of paper over the area to be redrawn.
   
The picture (far right) shows a layer of water soluble stabilizer on top of the drawing.  
I have started to trace the lines.  


How much of the drawing is traced to the stabilizer is personal preference.  I want freedom to develop the picture as I go along, but free motion stitches are not easily removed.  For this picture, I was comfortable with these basic shapes.

New Canvas

These sketches were stitched on 10 oz. canvas painter's drop cloth.  I found it in my stash, left over from a painting project.   I love the texture and thought the weight would hold up to heavier stitching.  I was not disappointed, but should warn that although heavier in weight, it still stretches.  I applied Sulky Sticky+ self-adhesive, tear-away stabilizer to the fabric back.  That was enough for these thread sketches, but a more densely stitched project might need additional or heavier stabilizer.

After the basic animal shapes were stitched, I stitched the background.  Although I try to have vague plan for background design before stitching, most background elements are added as I go.    

Elements can be auditioned on stabilizer before stitching. 


After the background is complete, I add detail to primary elements.  


The stitched canvas was sewn to a piece of burlap and a sleeve added to the back for hanging.  The final canvas size is about 11 x 15.


Elephant Stitches

I used the same process for the elephants.  Layers of paper tell the tale of edits.


Squiggly lines of stitching were used to depict a wrinkled hide.


Finished thread sketch is about 11 x 15 inches.

New Ideas to try

Using the 10 oz. canvas made me think of perhaps embellishing a thread sketch with paint.  And, a friend's generosity has inspired me to try sketching the prints of an African artist.  Sew much thread, sew little time!  

Thank you for visiting.  I hope you will return.  

Wednesday, December 7, 2016

Pet Portraits in Thread

Any time we look out our window, day or night, rain or shine, we see someone walking their dog.  Living in the suburbs, we never noticed this many dogs.  Probably because they remained in fenced yards, hidden from view.  We heard them, but rarely saw them.  Living in the Pearl, we see them, but seldom hear them.  There are few areas where dogs are not allowed.  We see them in coffee shops, grocery stores and leashed to tables at outdoor seating areas.  They are not allowed in Tanner Springs Park, but just two blocks away is The Fields park, built with dogs in mind.  We see many of them often enough that they feel like old friends. 


Coffee bud, Shasta
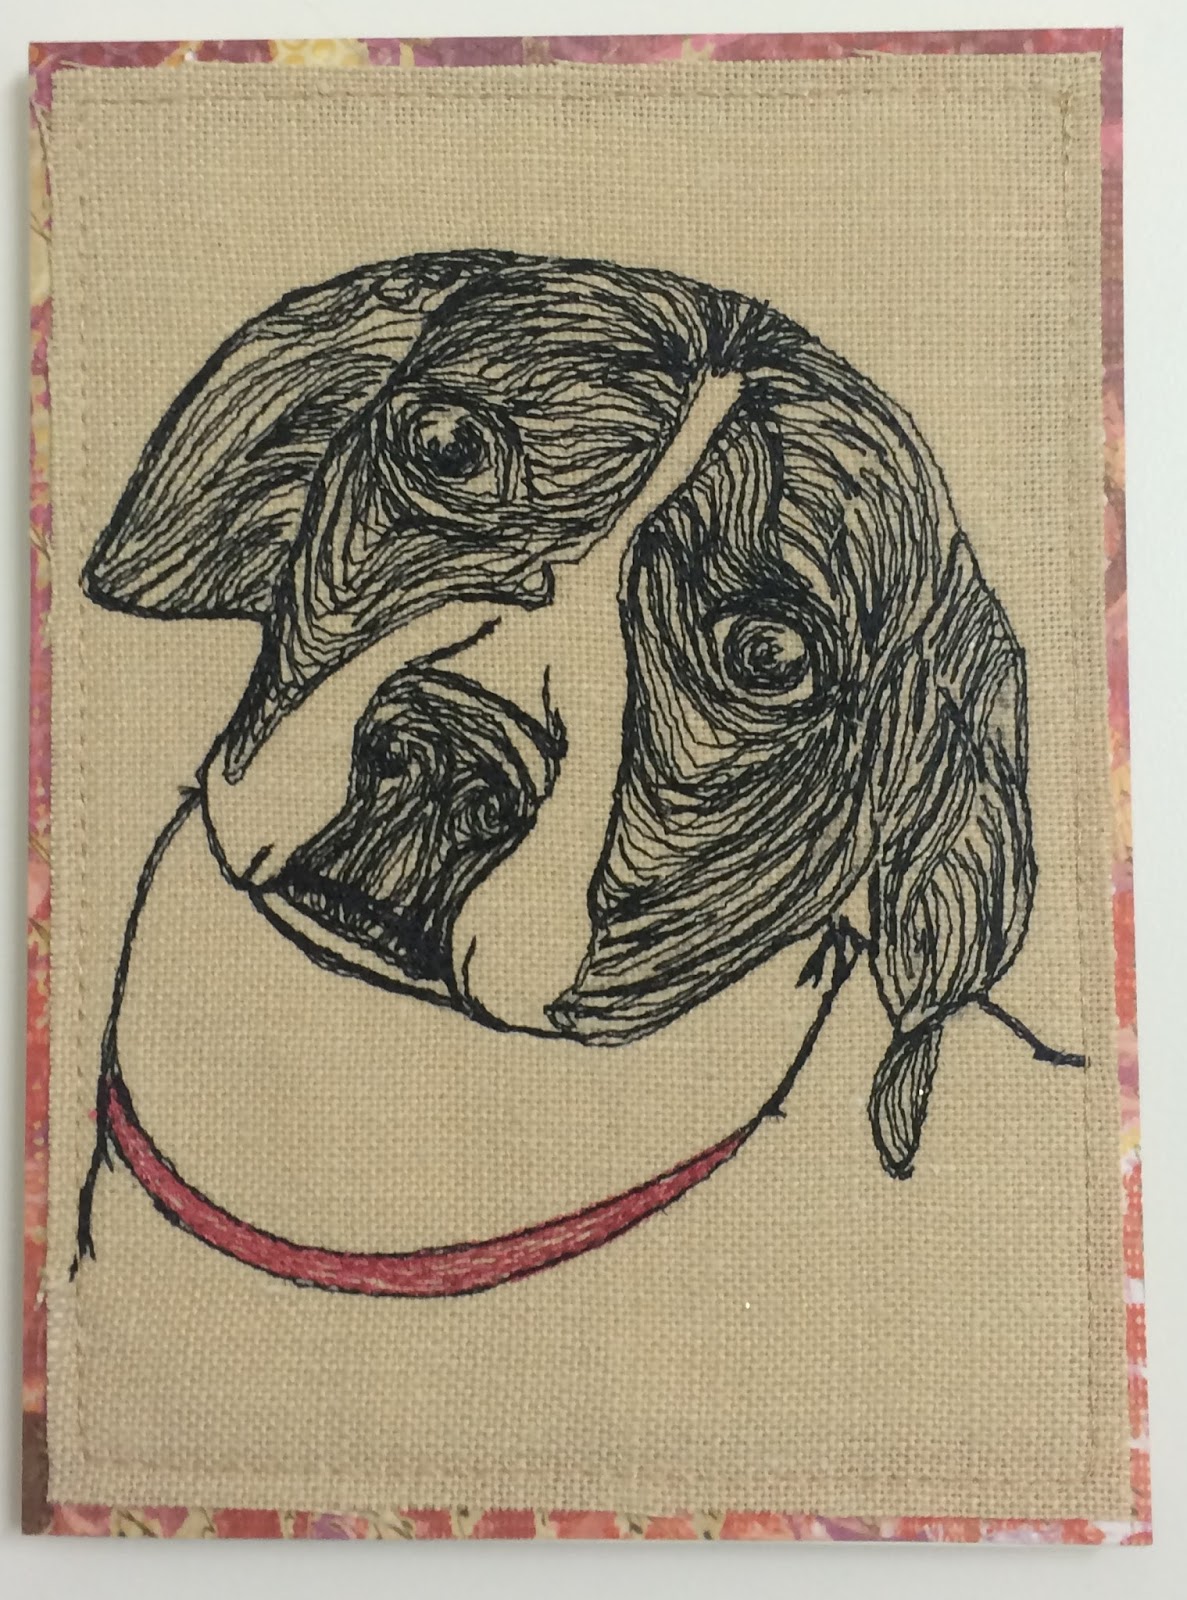
My first attempt at a thread sketched pet portrait was when our friends left their Westies with us for an afternoon "play date".  We enjoyed having them.  I took pictures like a doting aunt.  While reviewing my photos for thread sketch possibilities, I found a particularly cute photo of the two.  It took several attempts, but finally, I completed a sketch that I felt was good enough to send as a greeting card.

That was more than six months ago, and since then, I have completed about a dozen pet portrait thread sketches.   I have tried several techniques and sometimes a sketch takes several trials.  With a little practice, I believe anyone with a sewing machine (or using hand embroidery) can create their own thread sketch pet portraits.  Here are a few examples and explanation of how I created them.  I hope you will be inspired to try your own sketch.


NEW!
You can see all my projects on my 


Selecting Subject and Photo

Some animals are more difficult to stitch than others.  White dogs, for instance, are more difficult to capture in thread.  It is tricky to add texture and shadows without making the animal look brown or gray instead of white. 


This is my first pet portrait.  Zach and Izzy are pure white.  The gray shadows create doubt as to the color.  There is a lot more thread in this earlier sketch than used in later sketches.  I used a dark background thinking the white thread would show better.  

Daisy is white, gray and black.  Several shades of gray were used to detail her gray fur and the shadowed white fur.  There are fewer stitches in this more recent thread sketch.  

Preparing the Photo

I usually enhance the photo by cropping and lightening the photo for printing and tracing. Occasionally, I use Photoshop Elements to turn the photo into a line drawing.  Although I refer to the original photo while stitching, a line drawing reduces the detail making it easier to transfer the image to the stabilizer.   It can also help provide a better perspective on what will be stitched.   This is not necessary, but you can try it if you have trouble visualizing how to stitch the subject.  For example, this original photo of Shredder and Sadie is beautiful, but the shadows and Shredder's white fur made it difficult to see how I would stitch it out.
This line drawing provides clear lines that can be followed with the stitching.  For Shredder, I followed the curls of his fur.  Sadie's spots are much easier to see and stitch.  


G has very short hair, so I used a more abstract stitch pattern that still defines the curl of her ears and gives depth to her face and eyes.  For me, the style is dictated by the photo and subject.


Transferring Photo to Stabilizer

If you have artistic drawing ability, you can probably skip this step.  I want the portraits to resemble the pets as much as possible, so I trace the photo onto stabilizer.  I use Sulky's Solvy Water Soluable Stabilizer and a Sharpie Ultra Fine Point permanent marker to trace a few lines.  I just invested in a Dbmier light box which makes it much easier.    

When deciding how much detail to trace, try to think about pictures in a coloring book. Just basic lines that will serve as a guide while you stitch. There are several reasons to limit how much detail you transfer to the stabilizer.  The permanent marker dries quickly and, if used sparingly, will dissolve with the stabilizer.  Too much ink and it can leave black residue on your fabric.  The other reason to limit detail is that too many lines can be confusing as you stitch.   


Nettie

This stabilizer drawing was discarded because of too much detail.  I traced a second piece of stabilizer focusing on the outline, eyes, nose and mouth.  Had I gone ahead with this stabilizer, it may have left ink residue on the fabric.   


Stitching

I like stitching on heavy weave fabrics in light colors.  Whatever fabric you choose, it needs to be stabilized to support the stitching without puckering.  I use Sulky Sticky+ Self-Adhesive, Tear-Away.  It works for the lighter stitching.  A picture with heavier stitching, like the two Westies shown above, needs more stabilizer.  I still use the self-adhesive, but will add another layer of non-adhesive tear-away to the back.  

Using a light fabric marking pencil and a template, I mark on the fabric the dimensions of the card.  I do not trim the fabric close to the marked edge until after all the stitching is done. I try not to stitch within about 1/4 to 1/2 inch of that mark so when I trim the fabric after stitching, none of my stitches are cut away.   Adhere the stabilizer to the back of your fabric and pin the clear stabilizer with your traced picture on top.  You are ready to sew!  

Free-motion stitching becomes more comfortable with practice.  But, truly, for these pictures there are no rules.  Stitch length and density are personal preference.  I have a stitch regulator for my Bernina 770, but I prefer not using it for thread sketches.  I like to control the length of the stitches by moving the fabric faster or slower.  The bobbin thread will sometimes show.  If you do not like that look, you can adjust tension to ensure it does not happen.  I do not adjust the tension.  I either use the same color bobbin thread as used on top, or a similar shade or color to add interest to the stitches.   No rules!

Long and short stitches add interest to Jack's fur.
Jack is another coffee bud.  Jack's card also went to our Metropolitan building art show!
Because I think of my pictures as sketches, I use dark thread as you would a pencil to stitch the lines traced onto the stabilizer.  Sometimes, as with the sketch of Nettie, the pictures are stitched in only black.  If I plan to use more colors, I try to go from dark to light.  But, in reality, I rarely get through a sketch without going back to previous colors. When the picture is near complete, rinse the fabric under warm running water to remove the water-soluble stabilizer on top.  Do not yet remove the tear-away on the back.  Let it air dry or give it a press between two lightweight towels to dry it.  Once the permanent marker is gone, there may be areas where you need more thread.  Knowing when to stop stitching is a struggle for me.  With a pencil sketch, you can erase unnecessary lines, but pulling threads from your thread sketch is not as easy.  I will sometimes stop and set the sketch aside for a day before proceeding.  

When stitching is complete, the stabilizer on back can be removed or left on.  I usually remove as much as possible without pulling stitches.  Cut a piece of card stock the size of the greeting card to be used.  Trim the fabric to size depending on if you want the card stock to show like a mat.  Sew the fabric picture to the card stock and use double-side tape to adhere to the greeting card.   You can also sew the fabric photo directly to the greeting card and add a decorative paper insert to hide the stitches on the inside of the card.  No rules!   
Sadie sleeping in her mom's chair.  An example of stitching too close to the edge.  No room for matting.
I hope you will try doing your own thread-sketch greeting cards!  If you do, please share a picture.  I would love to see it!


Up Next!

I have several new subjects of interest for greeting cards.  Please come visit in January to see how they are progressing.  In the meantime, go to my Urban Stitcher Facebook page to see my latest projects.    

Monday, November 9, 2015

10th @ Hoyt Courtyard

A friend recently invited me to tour the courtyard located at the 10th @ Hoyt Apartment building in Portland's Pearl District.  Although you can see part of the courtyard from the street, it is typically gated from all but residents of the building. 

Once inside the courtyard, it is hard to believe you are only steps away from busy NW 10th Street.  Greenery, water features, and seating make it feel more like a secluded park than an apartment courtyard in the middle of the city. 

The courtyard officially opened in 2003.  It was designed by Steve Koch, not only to soothe our senses, but to meet a Portland mandate that buildings of a certain size manage and treat storm water on site.  Amazingly, the casual visitor to this oasis would not recognize that the water is actually runoff recirculating through artful structures in the courtyard.


There are several websites with photos of the entire courtyard.  I took this photo on a cloudy day in early October.  It shows one of several water features in the courtyard.

Thread Sketch

With larger sketches, I must rely on my limited artistic ability to transfer the basic lines by hand.  On smaller sketches, a printer can be used to transfer the original photo.  I have tried several techniques with the printer.  The photo can be printed directly to the cotton canvas, or onto the Pellon 926 extra firm stabilizer on the back.  With these techniques the ink remains with the project through completion and can be messy to handle, much like a newspaper.  

For this project, I printed on a tear-away stabilizer that could be removed after transferring the basic lines.  Because I wanted to apply the tear-away to the back side of the canvas, I used Photoshop to reverse the picture.  The tear-away could be applied to the front, but would require greater care to remove all the stabilizer.
In this photo, I have already stitched the basic shapes and in process of removing the tear-away stabilizer.  You can see how well the printer works with the tear-away stabilizer.

Bobbin thread outlining the shapes.

Completed project, 8"x10"
It was a challenge depicting the greenery as individual trees and shrubs.  Shades of green, brown, gold and yellow threads were used to free-motion stitch a variety of small leaf shapes to define individual shrubs.


Coming Soon 

Although Christmas projects continue, I have completed several greeting cards that I will post in about two weeks.  Please visit again.  


Friday, September 25, 2015

10th Avenue Boardwalk


In Portland's Pearl District, a wooden boardwalk runs on 10th Avenue from Johnson to Northrup linking three city parks, Jamison Square, Tanner Springs, and The Fields.  Trees canopy the boardwalk adjacent to Jamison Square.  Several cafes in the area provide outdoor seating.  Although surrounded by busy city streets, it is peaceful and pleasant. 

The boardwalk runs next to our building, so we use it often.  Never has it looked more lovely than a recent September day.  The late summer sun was shining through the thinning leaves.  Yellow leaves on the boardwalk and still clinging to the trees seemed to glow.  Here is my thread sketch version of the photograph we took.


10th Avenue Boardwalk
Finished size 8"x11"

Friday, August 14, 2015

Benson Bubbler


Benson Bubbler Thread Painting 
finished size 8-1/2" x 11-1/2"

Portland has a distinctive style that comes from embracing its own history. The bridges, streets, buildings and the works of art that grace the city are an eclectic mix of old and new.  The Benson Bubblers are part of the rich history decorating our city.  

Friday, July 31, 2015

Process & Puzzles

Process to Puzzle

In my last post, I published a snapshot of our beautiful Tanner Springs Park.  We sit above the park and enjoy it all year.   From June to October, we spend happy hour on our patio watching people and resident water fowl come and go.  During cooler months we admire the park from our family room.  Regardless of the time of year, there is always something going on in the park.  My husband and I chuckle that we attend more weddings and photo shoots than anyone in Portland.   It is our love for the park that motivated me to try stitching it.  It was a challenging project.  Most of the complications were self-inflicted.  The steps and a few photos follow.  I have noted the lessons learned that will make the next picture project easier. 


As I examined the original photo posted last week, I realized that the photo was missing the graceful arch of the Fremont Bridge.  I rushed outside and took another photo.  I caught a street car gliding by and decided to add it as well.  

Sunday, July 19, 2015

Welcome To My Sewing Room!

This is where I spend my days planning and plotting new projects.  Although the room also serves as an extra bedroom and office, everything works well together.  It is often in a state of messiness, but I love spending my time here.  

I enjoy several hobbies, but sewing is my passion.  For 15 years, I used a Bernina 180E.  I very recently upgraded to the Bernina 770E.  There is a learning curve, but I already love it.