
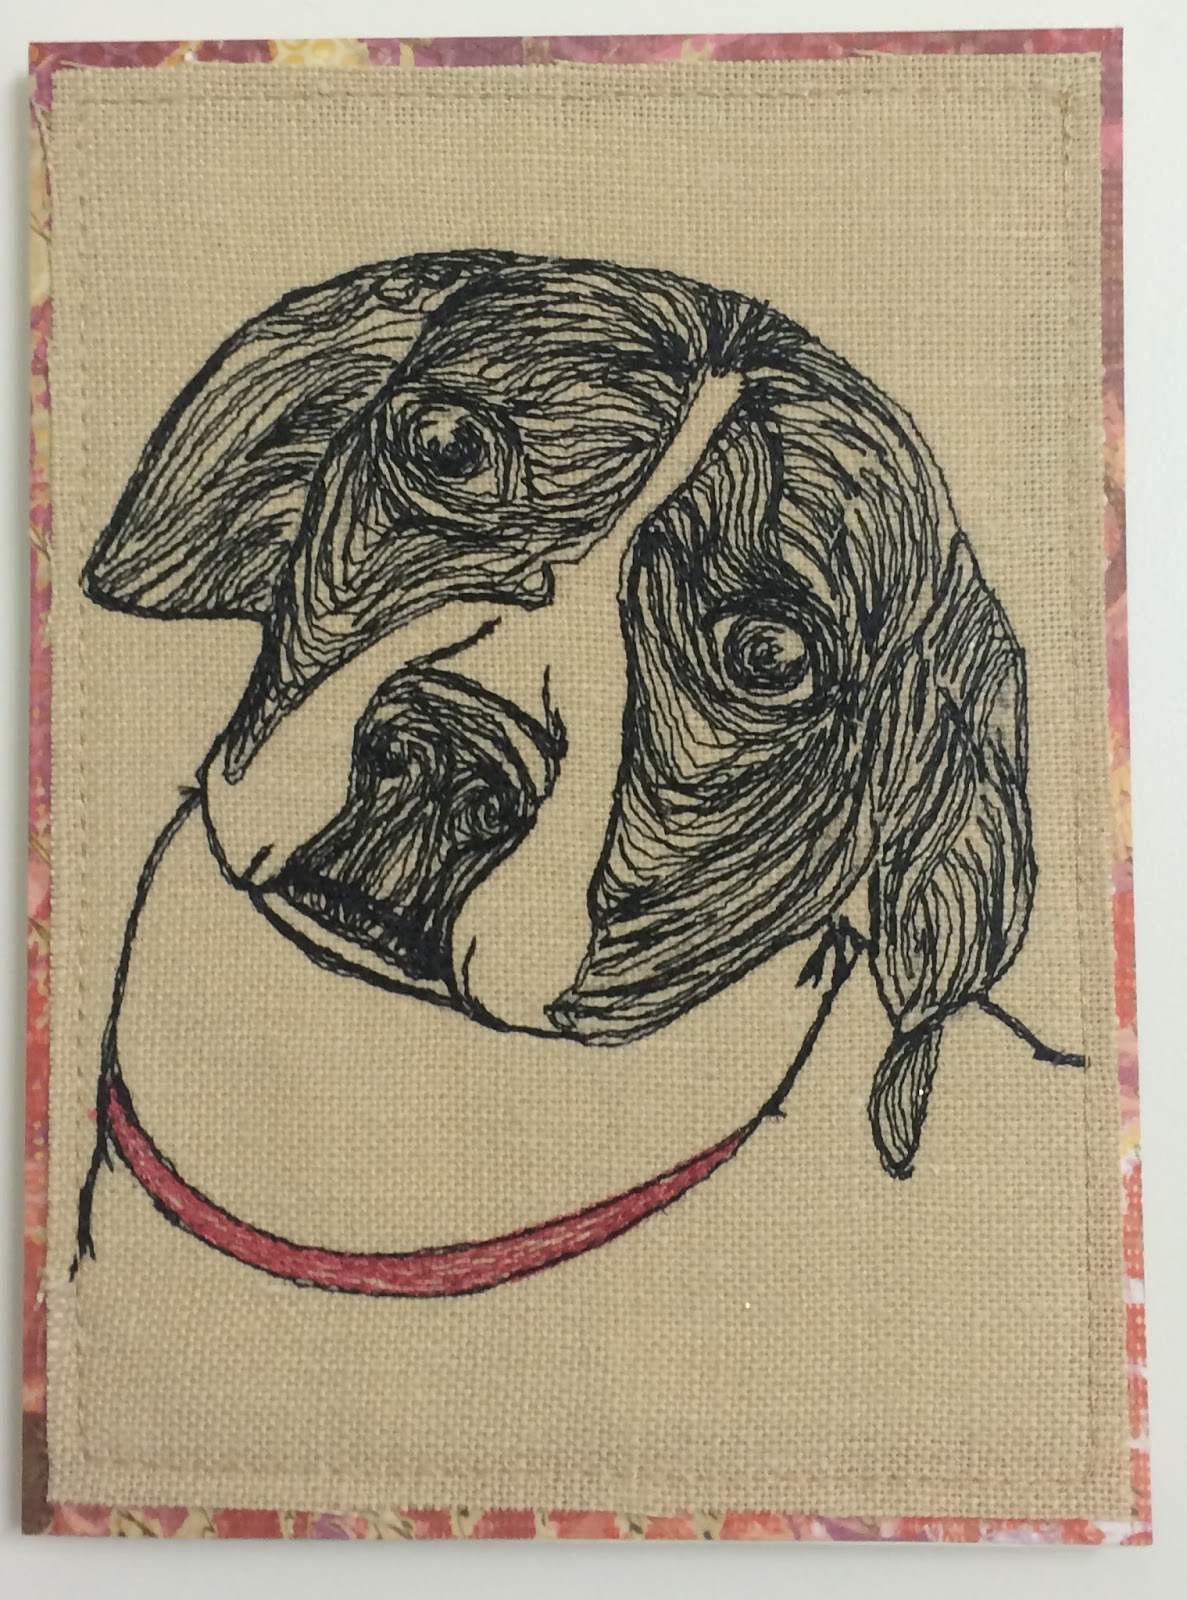
 |
| Coffee bud, Shasta |
That was more than six months ago, and since then, I have completed about a dozen pet portrait thread sketches. I have tried several techniques and sometimes a sketch takes several trials. With a little practice, I believe anyone with a sewing machine (or using hand embroidery) can create their own thread sketch pet portraits. Here are a few examples and explanation of how I created them. I hope you will be inspired to try your own sketch.
NEW!
You can see all my projects on my
Selecting Subject and Photo
Some animals are more difficult to stitch than others. White dogs, for instance, are more difficult to capture in thread. It is tricky to add texture and shadows without making the animal look brown or gray instead of white.
This is my first pet portrait. Zach and Izzy are pure white. The gray shadows create doubt as to the color. There is a lot more thread in this earlier sketch than used in later sketches. I used a dark background thinking the white thread would show better.

Daisy is white, gray and black. Several shades of gray were used to detail her gray fur and the shadowed white fur. There are fewer stitches in this more recent thread sketch.
Preparing the Photo
I usually enhance the photo by cropping and lightening the photo for printing and tracing. Occasionally, I use Photoshop Elements to turn the photo into a line drawing. Although I refer to the original photo while stitching, a line drawing reduces the detail making it easier to transfer the image to the stabilizer. It can also help provide a better perspective on what will be stitched. This is not necessary, but you can try it if you have trouble visualizing how to stitch the subject. For example, this original photo of Shredder and Sadie is beautiful, but the shadows and Shredder's white fur made it difficult to see how I would stitch it out.


Transferring Photo to Stabilizer
If you have artistic drawing ability, you can probably skip this step. I want the portraits to resemble the pets as much as possible, so I trace the photo onto stabilizer. I use Sulky's Solvy Water Soluable Stabilizer and a Sharpie Ultra Fine Point permanent marker to trace a few lines. I just invested in a Dbmier light box which makes it much easier.When deciding how much detail to trace, try to think about pictures in a coloring book. Just basic lines that will serve as a guide while you stitch. There are several reasons to limit how much detail you transfer to the stabilizer. The permanent marker dries quickly and, if used sparingly, will dissolve with the stabilizer. Too much ink and it can leave black residue on your fabric. The other reason to limit detail is that too many lines can be confusing as you stitch.
 |
| Nettie |

This stabilizer drawing was discarded because of too much detail. I traced a second piece of stabilizer focusing on the outline, eyes, nose and mouth. Had I gone ahead with this stabilizer, it may have left ink residue on the fabric.
Stitching
I like stitching on heavy weave fabrics in light colors. Whatever fabric you choose, it needs to be stabilized to support the stitching without puckering. I use Sulky Sticky+ Self-Adhesive, Tear-Away. It works for the lighter stitching. A picture with heavier stitching, like the two Westies shown above, needs more stabilizer. I still use the self-adhesive, but will add another layer of non-adhesive tear-away to the back.
Using a light fabric marking pencil and a template, I mark on the fabric the dimensions of the card. I do not trim the fabric close to the marked edge until after all the stitching is done. I try not to stitch within about 1/4 to 1/2 inch of that mark so when I trim the fabric after stitching, none of my stitches are cut away. Adhere the stabilizer to the back of your fabric and pin the clear stabilizer with your traced picture on top. You are ready to sew!
Free-motion stitching becomes more comfortable with practice. But, truly, for these pictures there are no rules. Stitch length and density are personal preference. I have a stitch regulator for my Bernina 770, but I prefer not using it for thread sketches. I like to control the length of the stitches by moving the fabric faster or slower. The bobbin thread will sometimes show. If you do not like that look, you can adjust tension to ensure it does not happen. I do not adjust the tension. I either use the same color bobbin thread as used on top, or a similar shade or color to add interest to the stitches. No rules!
 |
| Long and short stitches add interest to Jack's fur. Jack is another coffee bud. Jack's card also went to our Metropolitan building art show! |
Because I think of my pictures as sketches, I use dark thread as you would a pencil to stitch the lines traced onto the stabilizer. Sometimes, as with the sketch of Nettie, the pictures are stitched in only black. If I plan to use more colors, I try to go from dark to light. But, in reality, I rarely get through a sketch without going back to previous colors. When the picture is near complete, rinse the fabric under warm running water to remove the water-soluble stabilizer on top. Do not yet remove the tear-away on the back. Let it air dry or give it a press between two lightweight towels to dry it. Once the permanent marker is gone, there may be areas where you need more thread. Knowing when to stop stitching is a struggle for me. With a pencil sketch, you can erase unnecessary lines, but pulling threads from your thread sketch is not as easy. I will sometimes stop and set the sketch aside for a day before proceeding.
When stitching is complete, the stabilizer on back can be removed or left on. I usually remove as much as possible without pulling stitches. Cut a piece of card stock the size of the greeting card to be used. Trim the fabric to size depending on if you want the card stock to show like a mat. Sew the fabric picture to the card stock and use double-side tape to adhere to the greeting card. You can also sew the fabric photo directly to the greeting card and add a decorative paper insert to hide the stitches on the inside of the card. No rules!
 |
| Sadie sleeping in her mom's chair. An example of stitching too close to the edge. No room for matting. |