The holidays are over and I am settling back into routine. A new blog post is overdue so thought I would do a quick tutorial on how I made the botanical greeting cards recently posted in my Urban Stitcher® Etsy shop. They are fun to make with endless possibilities. I will mention the supplies I used, but honestly, there are no rules. You probably already have everything you need to get started.
I wanted a simple design to accommodate a variety of media, including free-motion sewing machine stitches.
As with most all my projects, I started with a sketch pad.
Now, switching to my 9"x12" watercolor pad, I cut one sheet in four 4-1/2" x 6" pieces. My blank card stock is 4-5/8 x 6-1/4, so no waste! I prepared the watercolor paper with a simple wash. I will not dwell on how to do this. I am not accomplished with watercolor, but there are great tutorials on YouTube that have helped me learn the little I know.
I traced the outside line of the picture to a paper-backed adhesive. I use Pellon's Wonder Under. The paper will be peeled away, so pencil is fine to do the tracing.
After tracing, I loosely cut around the image. More care will be taken in cutting out the image after adhering it to the decorative paper.
After the basic shape was cut out, I used my steam iron on low heat/no steam to press the Wonder Under image to the back of decorative paper. Any kind of paper or fabric can be used. I used Thai Mulberry paper in several colors.
Now it is time to carefully cut around the image. When the image is cut out, peel the Wonder Under paper backing away from the decorative paper, flip it over and use the iron again to press it to the prepared watercolor paper.
I used a Frixion Clicker Erasable pen to draw the detail I want to stitch. This is my favorite pen anytime I need to make a temporary mark on fabric or paper. It disappears with a light press with an iron.
I used a very dark green Sulky 40 wt rayon embroidery thread to stitch the detail in free-motion. It is good to plan how you will stitch the lines. The needle makes holes in the paper. It's part of the charm unless you go over the same area too many times.
Sometimes it is necessary to stop stitching in one area and move to another area. In that case, I leave a long tail on my threads so I can come back later, pull them to the back side, and knot them on back.
In this picture, the flower is completed. The watercolor paper has been trimmed to a size that will allow me to use a "mat" and still fit on the blank card stock. I will use a needle to pull these threads to the back side and knot them.
I use double backed tape to adhere the watercolor paper/mat onto the blank card stock. I like the layered look, so my picture was trimmed to allow a bit of mat and the blank card to show below. Again, just personal preference.
I used very little stitching on this card because the embedded mulberry leaves add so much character.
Some of these leaves were too small to detail with decorative paper, so I used a little watercolor to give them color.
That's it! Simple greeting cards made with love. I hope you are inspired to try making some of your own! Thank you for visiting. Between blog posts, please visit Urban Stitcher on Facebook and Etsy.
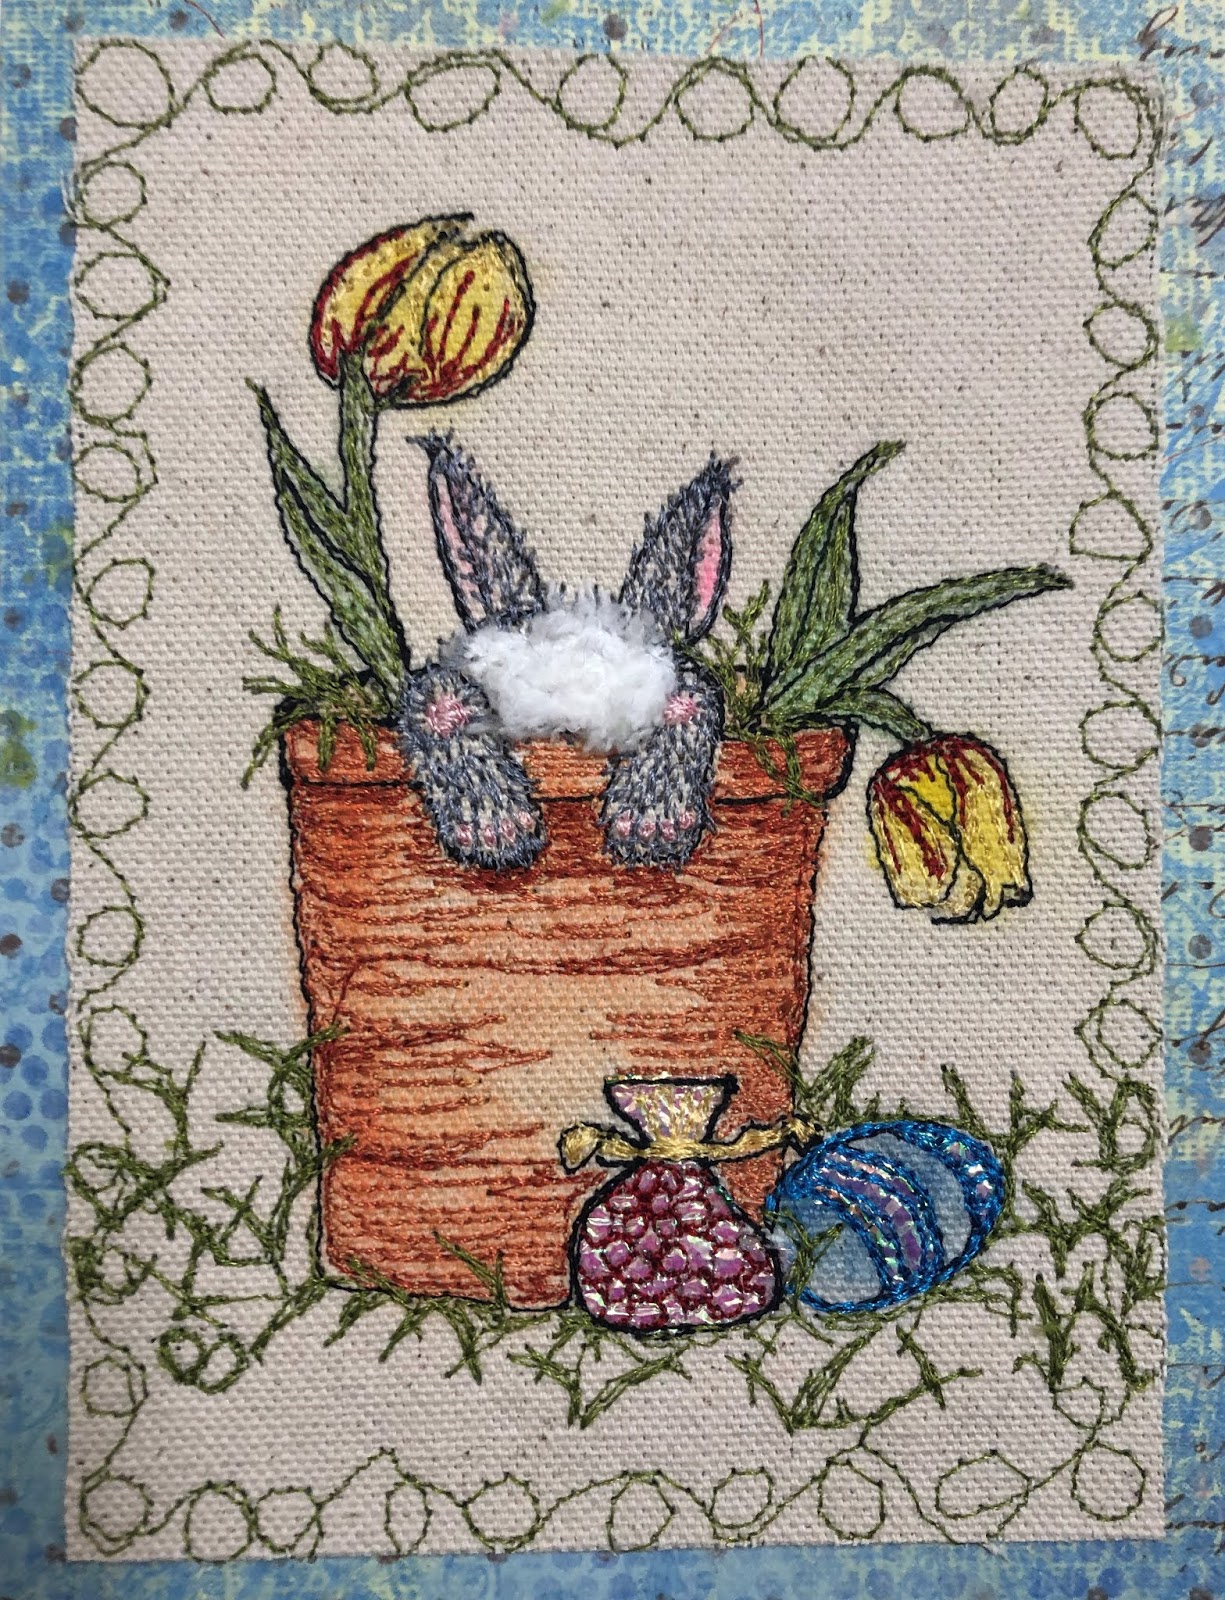
Years ago, I made a cute little Easter centerpiece using a small red clay pot, a little felt, and a few fluffy pom-poms purchased at the craft store. I know you have seen them....the felt and pom-poms are glued to the side of the clay pot to make it look like the bunny is head first into whatever you are displaying....candy or flowers. I recently came across a picture of one posted online, and it inspired me to make Easter cards with bunnies in pots. I had no other projects in the works, and thought it might be a good time to experiment. I added mylar, fluffy yarn, chalk, and a water color pad to my normal routine. I had not originally intended to blog about the Funny Bunny Easter cards, so there are only a few in-progress pictures. Hopefully, it will be a light on words and heavy on inspiration!
Mylar and Chalk Accents
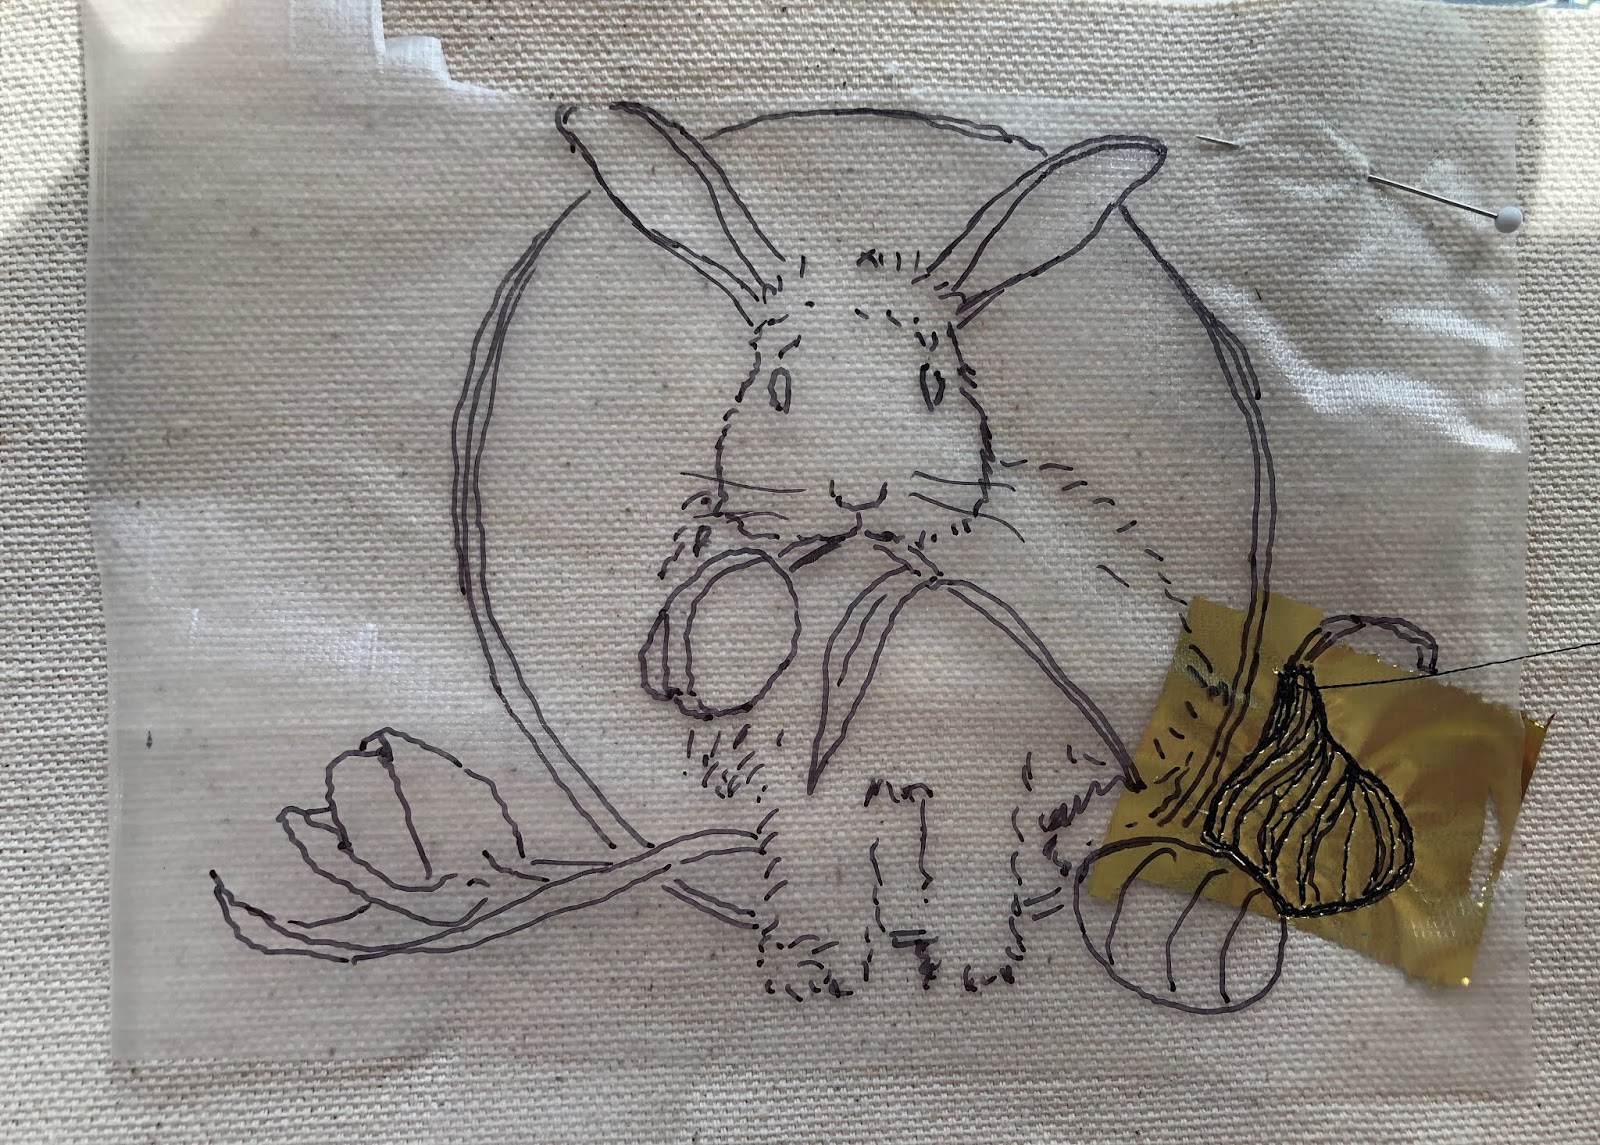
I have been playing around stitching mylar. It is a common practice when using a machine embroidery module. Until recently, I had never tried it with free-motion. My favorite mylar is a transparent opalescent. I could not find it locally, so purchased a single sheet from Etsy shop StitchednFaith. It seemed expensive, but it turned out to be well worth the price. I have made several cards and still have quite a bit left, so you will be seeing it in future posts. For the thread-sketched Easter cards, I used a combination of gold and the opalescent. The gold is opaque and requires a little more handling, as demonstrated here.
After drawing the image on my sketch pad, and transferring the image to water-soluble stabilizer, I cut a small piece of mylar to fit where the large candy Kiss would be stitched. I added the gold mylar first. It is opaque making it impossible to use the stitched lines as a guide. I will mention here that this bunny was originally drawn on my regular sketch pad. I eventually drew it again on the water color pad for the painted bunny. More about that later.
The candy Kiss was stitched first. Before stitching anything else, the excess mylar was removed so it would not interfere with surrounding objects.
I carefully lifted the water soluble stabilizer, removed the excess mylar, and continued stitching the rest of the image.
After transferring the outline to the canvas, I filled in with colorful thread. A bit of the opalescent mylar decorates the Easter egg. Fluffy yarn was stitched to the head and tail. After stitching was completed, a small paint brush was used to add a little pink chalk to the ears and face, and yellow chalk to tulips.
As with all my cards, the canvas and card stock border are affixed to 4-1/2 x 6 inch folded greeting card. The stitched card is done, but the fun is not over!
Water Color Paper
When I first started free-motion thread sketching, I used scratch printer paper to sketch, or in some cases, trace the images. As I became more comfortable with drawing, I switched to sketch pads, now filled with hundreds of images that I will probably not use again. I recently purchased a water color pad at our local Blick store and decided this would be a good time to give it a try. Double the fun regardless of how well they turn out! If it works out, more cards and fewer sketches cluttering my sewing room! There were some gotcha's for me. First, I use a lot of eraser on my sketches. The erased lines and damaged paper do not affect the end product when I am transferring the image to stabilizer. However, my sketches need a lighter hand and very little eraser to keep the water color paper in-tact for paint.
This sketch was made on the water color pad. Even though I tried to keep the pencil light, there were areas where I got carried away. Because I like to draw over the pencil in ink, the dark lines do not matter as long as I do not erase.
I currently have only water color pencils because that is what I like to use on my canvas thread sketches. However, It was my experience that the water color pencils took a toll on the water color paper. Perhaps, again, it was my heavy hand. Although happy with these first efforts, I am anxious to try regular water colors. Since fraying is not an issue with the water color paper, a clean, simple stitch works to adhere the card to the border card stock.
Here is the same sketch stitched in thread with a little chalk accent.
In addition to bright, warm sunshine and brilliant colors, autumn brings a little melancholy that cannot be fully explained. Perhaps my wistfulness simply laments the end of another beautiful Portland summer.
These thread-sketched greeting cards celebrate summer in Tanner Springs Park.
Because the cards were created using the same steps described many times, there are few words of explanation. As always, please let me know if you have questions about product or process.
I hope you enjoy.
Heron
Sketch pad drawing of a new heron who visited a few days this year.
Sketch transferred to water soluble stabilizer, taped to canvas and ready for outline stitches
After stitching the outline in black, a little acrylic paint was used to add background color before filling in more free motion stitches.
4x6 greeting card
Bench
Sketch of bench where the spring bubbles up.
Finished 4x6 greeting card
Baby Ducks
Nothing heralds spring and summer in Tanner Springs like the arrival of baby ducks.
Lily Pads and Carp
My sketch does not do justice to the beautiful water lilies in the Tanner Springs pond.
The introduction of carp into the pond threatens the ecosystem. It is amazing how large some of the carp have grown in such shallow water. It is still unclear how the problems caused by the carp will be resolved. The carp was not part of the photo I took in the park. I decided to add it later to create more interest.
This carp is more colorful than the carp you will see in Tanner Springs.
Thank you for visiting. I hope you will come back again.
I am lucky to have had many remarkable women in my life. My mother has been gone for years, and I am missing my sister this year, but they were both in my thoughts as I stitched these Mother's Day cards for my mother-in-law as well as the other amazing mothers in our family. These cards are more whimsical than my typical cards. I created the designs for light stitching on dish towels. I liked them so well, I reduced the size and reused the designs for these cards. I used the same method explained in many of my blogs, so will not dwell on the basics. The pictures below depict how easy it is to create a simple and charming card. Basic design outlines were stitched in black. While the fabric was still damp from rinsing the stabilizer, I used water color pencils to add just a bit of color to the main objects. Small hearts cut from fabric were positioned and stitched down with complimentary threads. Trimmed and stitched to card stock for mounting onto blank greeting cards. Happy Mother's Day!
In honor of Father's Day, I thread-sketched fish to make greeting cards for all the Father's in our family. King Sailfish Mounts allows use of their images of mounted fish. There are so many beautiful images, I spent a lot of time perusing their site trying to decide which fish to use. I stayed true to my normal materials and process, adding color to the fabric before stitching, then using machine free-motion to stitch the images. The cards are posted here with very little explanation. I hope you enjoy.
Peacock Bass Anyone familiar with free-motion quilting will recognize the pebble stitch used here to give the illusion of scales. Several layers of very small pebble stitches and running stitches allow colors to blend. Stabilizer is key with so many stitches.
King Salmon The hardest part to stitch on the King Salmon was the small black spots. Each spot was stitched separately and the thread was cut between each spot. It is important to ensure the threads are secure so they do not pull loose.
Mutton Snapper Many, many tiny shell and pebble stitches.
Bluegill I selected this bluegill because it reminds me of the little bluegill and perch we caught as kids fishing with Mom and Dad in Arizona. Free-motion shell stitches create the illusion of scales.
Striped Bass This is the only fish not found on King Sailfish Mounts. It was inspired by the artwork of Duane Raver Jr.
Beautiful Portland summer months lure me away from my sewing machine. Armed with my trusty iPhone camera, I plan to take advantage of the dry weather to capture stitchable pictures of our neighborhood. I may sneak a project in here and there, so check back occasionally for updates. Pictures of most all my projects are posted on my Urban Stitcher Facebook page. Thank you for visiting. Please come back!
Basket weaving is one of the oldest known art forms. Nearly every native people, dating back thousands of years, used a variety of organic materials to weave baskets, mats, even rafts. I had a chance to make a basket a few years ago when a friend of our daughter visited while we were visiting. She brought all the supplies and patiently instructed while everyone participated. It was great fun, but not an art form I could easily do living in a condominium. The idea to thread-sketch woven baskets was sparked while working on the stitched interpretations of the F. Abel paintings. The basket weave seemed perfect for thread sketching. Shapes and designs would be limited only by the imagination, and as complex or simple as you like. I completed four sketches. Three of the sketches will be framed or used as cards. One of the baskets turned into a learning experience. Because I am unfamiliar with "basket weaver" terminology, I have included many pictures to help explain what worked for me and what did not.
Flaw to Feature
Because the free-motion stitches are almost impossible to remove, mistakes need to be worked into the final design. This first basket looks quite different than I originally intended.
The initial pencil sketch featured simple patterns around the body and the neck.
It is important that the horizontal "reeds" of the basket be drawn evenly across the basket. This picture shows the lines in the neck of the basket were not evenly spaced creating an unintentional feature. I first set my machine to a zig-zag stitch and used free motion to create the decorative features of the basket. Because my reed lines were uneven, it was easier to use straight stitch setting and move the fabric back and forth to create the woven look.
Design elements were added and changed as I went. The uneven lines in the basket neck became a featured flaw.
Loose zig-zag stitches were added to the neck. I was satisfied enough with this first attempt to try a few more baskets.
Lessons Learned
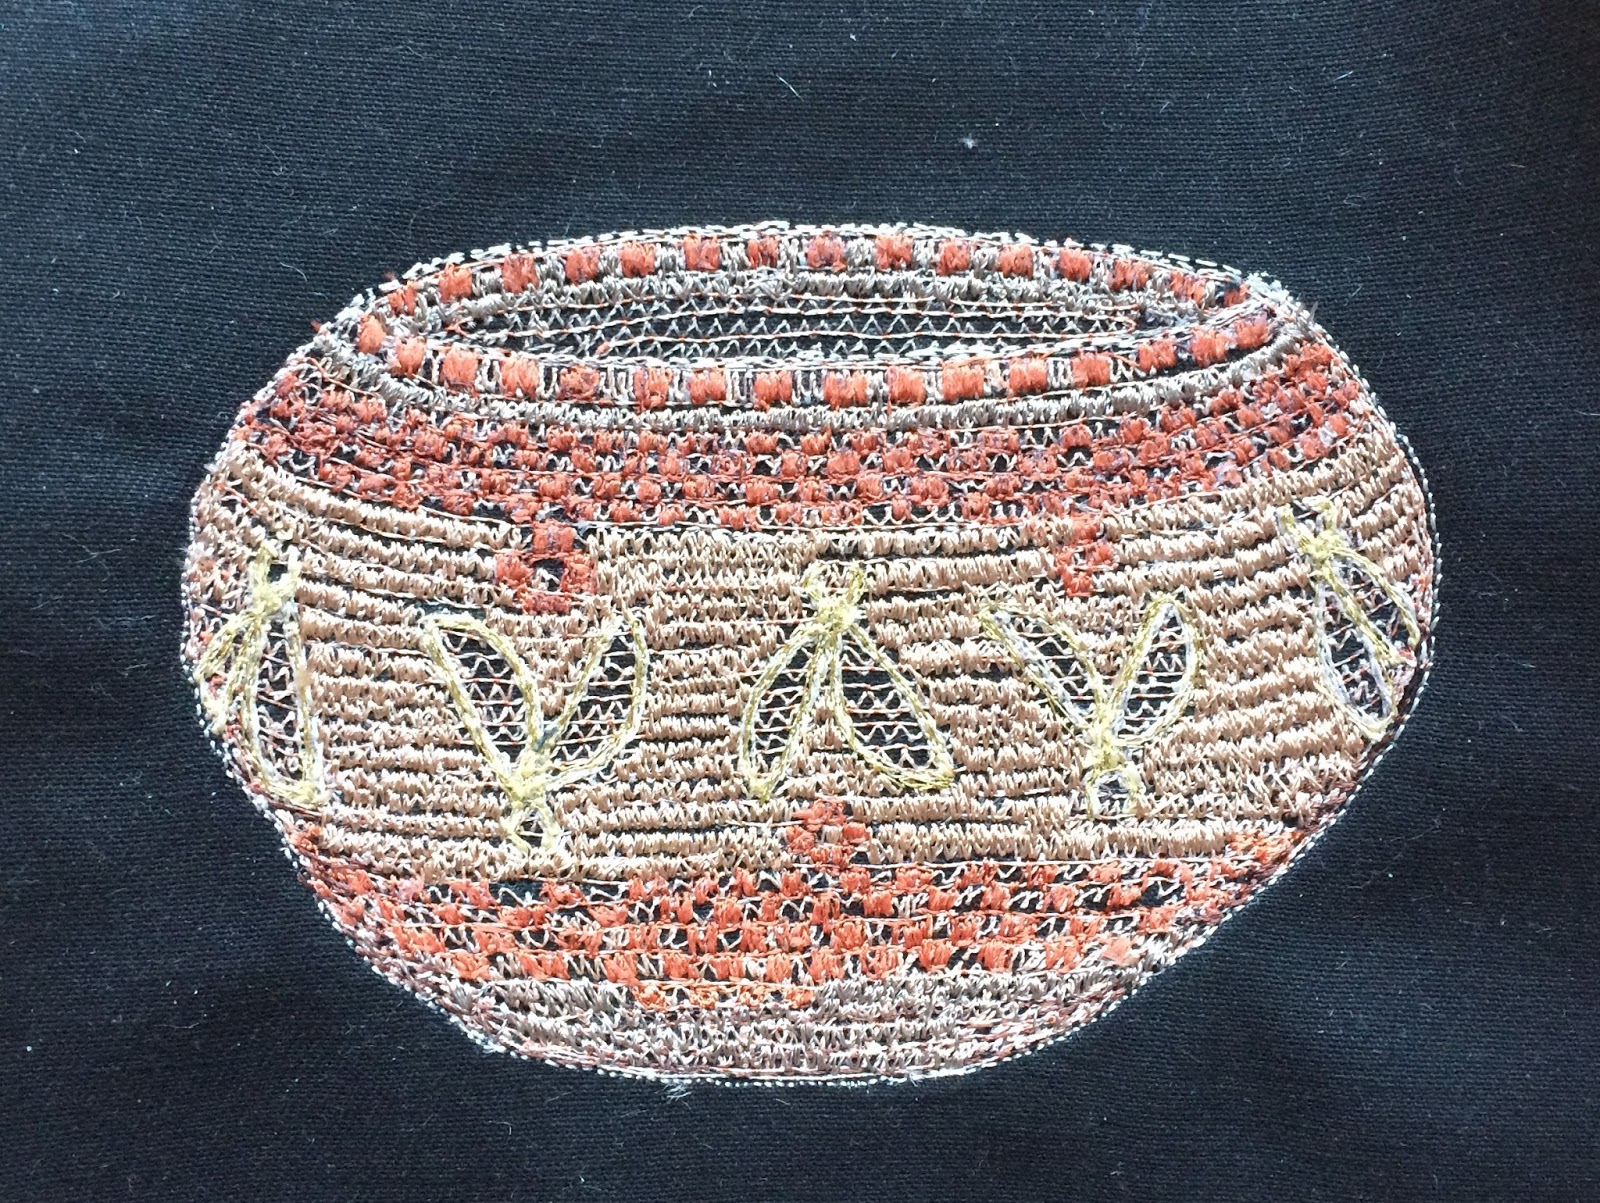
Normally, tracing the design to the stabilizer is a quick step, transferring only a few lines as a guide. Taking care to create even lines across the basket made it more time consuming. My confidence was high, so I tried a bit more difficult decorative pattern. You may recognize the insect wings as my logo.
I started with black twill fabric as the canvas. I thought I could stitch the reeds and the black fabric would create shadows and definition. I set my machine to zig-zag stitch and used free motion to stitch the rows. It did not work for me. I lost the curve of the basket and it looks messy. At this point, I still had hope of saving it. However, because the decorative pattern was no longer visible under the zig-zag stitches, I had to re-draw the pattern onto a second piece of stabilizer. egads!
A bit of frustration and a mile of thread later, I decided it was a lost cause. Perhaps more practice using the machine zig-zag stitch in free-motion.
Back to Basics
Not as confident after the last basket, I found a photo I could follow rather than making my own design. I traced the shapes and reed lines onto the stabilizer. I used free-motion with a straight stitch to create the reeds. The white spokes, or perhaps they are called lashing, were stitched next. They are long back-and-forth free motion stitches. The final black stitching added definition and dimension to each row of the basket.
Basket Composition
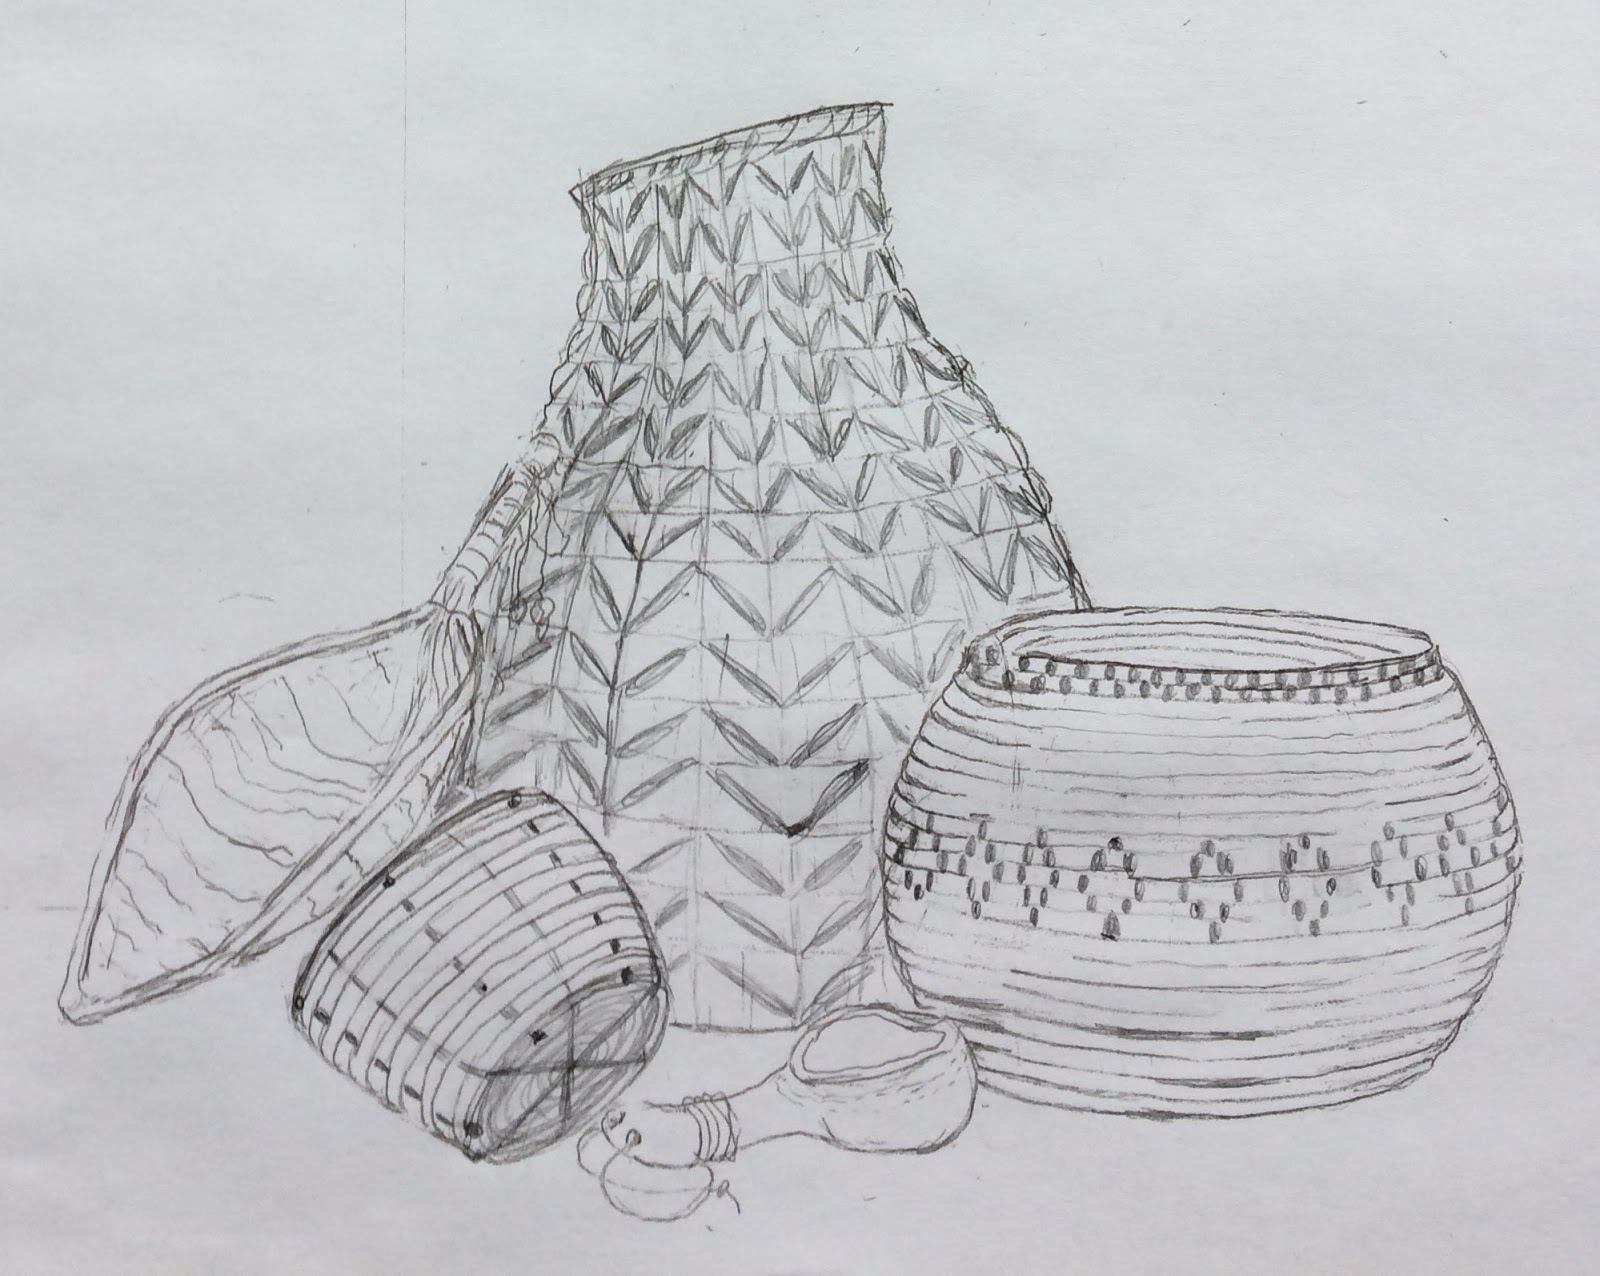
I do not have a trained eye for composition, so started with a pencil sketch and a very large eraser. Looking closely, you can see remnants of alid leaning against the basket on the right. The lid created a busy feel with too many lines. The eraser took care of the lid and the gourd ladle was added in its place.
The pencil sketch and first layer of water soluble stabilizer with basic shapes and reed lines.
Before applying the layers of stabilizer, I treated the fabric by dampening it with a bit of water and scrunching to create wrinkles. I gently straightened the fabric and while still damp, used acrylic paints and a dry-brush technique to highlight the wrinkles. I ironed the fabric removing as many wrinkles as possible. Once dry, I used an adhesive tear-away and a second layer of tear-away stabilizer on the back. Make sure your fabric is completely dry before layering the water-soluble stabilizer on top! The traced picture will dissolve with any moisture!
It is hard to see, but the basic shapes are stitched.
Easier to see on the back side
The reed lines were filled using free-motion and straight stitch setting.
To create the decorative designs, I photocopied the original sketch and played with patterns on the copy until I found a combination that appealed to me. Using the copy allowed me to audition and erase without erasing my original lines.
Just the decorative elements on the stabilizer. Precision is key. If your stabilizer stretches or your stitches have puckered the canvas, the second layer of stabilizer will not align with what you have already stitched.
A few shadows were added to the baskets before proceeding to the decorative stitches. Now, it is time to layer the second piece of water soluble stabilizer over the stitched basket shapes. Using tape rather than pins to hold stabilizer in place made it easier to match all the lines. The stitch patterns can be seen in these close-up photos. All stitches were free-motion on straight stitch setting. The black pattern lines on the small basket, and the rust colored pattern on the medium basket were created like satin stitches, moving the fabric back and forth multiple times with the needle inserting directly on the horizontal lines of the basket. It takes a little practice, but does not need to be perfect to produce satisfying results. I found that the free-motion satin-stitch type sewing requires same or similar color thread in the bobbin. Pulling the thread across the fabric exposes some of the bobbin thread. I like that look for some projects, but it was not something I wanted for this picture.
Re-stitching the horizontal lines with a dark color created contrast and draws the eye away from any errant needle entry points.
The basket thread sketches are time-consuming and a little tedious. It feels somewhat therapeutic, like,,,, well,,,,, like basket weaving! I think there is a more fun, and therapy, to be had with thread sketching baskets. Watch my Urban Stitcher Facebook page for more thread-sketched baskets. Thank you for visiting!